E9 | Garage Storage, Anode Rod | Ask This Old House
Season 24 Episode 9 | 23m 42sVideo has Closed Captions
Overhead garage storage; 3-way smart switch installation; anode rod maintenance.
Nathan Gilbert helps a homeowner organize her garage by installing an overhead storage rack for easier living; Heath Eastman demonstrates how to upgrade to a 3-way smart switch; Richard Trethewey demonstrates how to extend the life of a tank-style water heater by replacing the anode rod.
Problems playing video? | Closed Captioning Feedback
Problems playing video? | Closed Captioning Feedback
Funding for Ask This Old House is provided by The Home Depot, Renewal By Andersen, and ChipDrop.
Support provided by:


E9 | Garage Storage, Anode Rod | Ask This Old House
Season 24 Episode 9 | 23m 42sVideo has Closed Captions
Nathan Gilbert helps a homeowner organize her garage by installing an overhead storage rack for easier living; Heath Eastman demonstrates how to upgrade to a 3-way smart switch; Richard Trethewey demonstrates how to extend the life of a tank-style water heater by replacing the anode rod.
Problems playing video? | Closed Captioning Feedback
How to Watch Ask This Old House
Ask This Old House is available to stream on pbs.org and the free PBS App, available on iPhone, Apple TV, Android TV, Android smartphones, Amazon Fire TV, Amazon Fire Tablet, Roku, Samsung Smart TV, and Vizio.
Keep Exploring


This Old House Insider Newsletter
Get This Old House exclusive stories, tips, and behind-the-scenes information delivered right to your inbox every month.Providing Support for PBS.org
Learn Moreabout PBS online sponsorship♪♪ Kevin: On "Ask This Old House," our experts travel across the country to answer questions about your house.
♪♪ Today... looking for ways to organize your garage?
Nathan helps a homeowner install overhead storage.
Then Heath shows how to install a three-way smart switch.
And Richard gives a lesson on water heater maintenance by replacing an anode rod.
Richard: You could make the water heater last 20 years, versus 10.
Kevin: All that on "Ask This Old House."
♪♪ Veronica: Thanks so much for coming, Nathan.
I really appreciate it.
Nathan: Thank you.
Veronica: Um, yeah.
So we've been in this house now for a couple years, and we're expecting our first child.
Nathan: Congratulations.
Veronica: Thank you.
And, um, well, we thought now would be kind of the perfect time to really start working on the organization in here, 'cause I've heard kids come with a lot of stuff.
Nathan: They really do.
I got three of my own, and there's plenty of strollers and toys, and they just never stop coming.
Veronica: Oh, geez.
Nathan: So... Veronica: Great.
Nathan: I see you already have some organization going on here.
Show me what you got.
Veronica: Yeah.
So we have the overhead rack with probably an excessive number of... Nathan: Brackets up there.
Veronica: Brackets up there.
Thank you.
Yeah.
Nathan: I like it.
Veronica: We have this dresser that we picked up off the street.
Certainly not ideal, but, you know, it works.
Nathan: Kind of like a makeshift toolbox.
Veronica: Yeah.
And then these plastic racks that are probably just as old as I am from my dad... Nathan: Mm-hmm.
Veronica ...but not as sturdy as they probably should be for a kid.
Nathan: All right, well, I'm getting some ideas.
And we know organization's key with kids.
So I see maybe a heavy-duty rack here with some adjustable shelving because the strollers, the toys, I mean, they keep coming.
Um, maybe a toolbox to swap that out and then I see kind of a blank slate above my head.
We could probably do a rack up there.
Veronica: That'd be awesome.
Nathan: So I think a good place to get started is by emptying off those racks, and an extra set of hands is gonna be pretty helpful.
So this is my dad, Bill.
Veronica: Hi.
Great to meet you both.
Bill: Nice to meet you.
♪♪ ♪♪ Nathan: So here is your new adjustable ceiling storage rack, rated up to 600 pounds.
Veronica: Okay.
Nathan: But we definitely want to kind of keep it on the lighter side.
Totes and bins.
Things that you only want to grab once, twice a year.
Veronica: That'd be perfect.
Nathan: So we're actually gonna build it up in the air.
We're gonna find our ceiling joists and get into some good structure.
I think right about here above us would be nice.
Give ourselves about 3 or 4 feet to get a ladder down here, so when you're up on the ladder, you could access both sides.
Veronica: Yes.
Absolutely.
Nathan: Yeah.
So I see you have a little panel there.
I'm definitely gonna open that up and see what we're working with.
All right.
So we got our strapping.
We have our ceiling joists.
And it looks like it's framed... 16 on center, which is good.
We'll do our layout, ensure that we're getting into joists.
Then we'll fasten those brackets on.
All right.
[ Drill whirring ] I'm gonna pre-drill and then I'll secure the bracket with a lag bolt.
All right.
How does that look?
Bill: Good.
Nathan: Any adjustment?
Bill: Good.
Nathan: Good.
♪♪ ♪♪ ♪♪ Good?
Bill: Good.
♪♪ ♪♪ Veronica: Wow.
Nathan: All right.
Here it is -- your toolbox replacement.
Nice, heavy-duty unit.
Big drawer up at the top here, little ones on the side.
Soft-close options.
Veronica: Perfect.
Nathan: On wheels, easy to roll around.
I know that that's gonna be very heavy.
Veronica: Very.
Nathan: So I think that we should probably transfer those tools into here.
Veronica: Yeah.
Nathan: And then we'll roll this into place.
Veronica: Absolutely.
Nathan: And while you work on transferring those tools, me and my dad will put this heavy-duty shelving unit together.
All metal.
Even the racks are metal.
So really good for an unconditioned space.
Even better -- It's adjustable.
You can change the height of the shelves.
If you have something bulky, you can spread them apart.
Veronica: Sounds great.
All right, Veronica, what do you think?
Veronica: This looks amazing.
I mean, all the organization, all the storage for all the baby gear that I'm sure that's just gonna roll in over time.
Nathan: It's gonna keep coming and coming.
I want to show you one thing.
So right here, we put your stroller.
And I did this at my house -- I have the three girls and they have a lot of stuff.
So make sure when my wife backs in, easy in and out for strollers, kids' toys, beach stuff right onto the shelf out of the back of the car.
But as always, you're gonna adapt over time, change your layout... Veronica: Yeah.
Nathan: ...do what's best for you.
Veronica: Painting quite a picture, and I'm sure, yeah, as you said, things are gonna change over time.
Nathan: Absolutely.
Veronica: But this is amazing and I just can't thank you guys enough.
This is gorgeous.
Nathan: You're welcome.
Enjoy it.
Bill: You're welcome.
Take care.
Veronica: Thank you.
♪♪ ♪♪ Heath: With the switch to smart switches, I've been getting a lot of phone calls from homeowners who are finding certain configurations a little bit confusing.
Now, we have two basic types you're gonna find in your home.
The first one's gonna be a single-pole switch.
Now, this refers to a switch in one location that can control a light or multiple lights.
Very simple.
Has two screws on the side and the ground.
Pretty easy to replace and you can see the homeowner replaced two single poles here.
Where we're having some confusion is when it comes to the three-way switch.
And this refers to when we have at least two switches, two different locations controlling a light or multiple lights.
Here we have a three-way switch at the top of the stairs, controlling the light over the staircase, and one at the bottom of the stairs so you can turn them on or off from both locations.
Now, instead of just having the two screws, we have the two brass screws and an identified screw, and that can throw you off a little bit when you have different wiring configurations.
So what I want to do today is show you how to replace the traditional three-way switch with a smart three-way switch, and how to control it from both locations.
So the first thing I want to do before I get started is turn off the breaker.
All right, now that the power's off, I'm gonna go ahead and remove the wall plate.
♪♪ Then I'll take the switch out.
♪♪ All right.
So you can see this switch has the three wires on it.
And we have two brass screws... and this black screw.
The black screw is the common.
We want to pay attention to what wire is connected to this screw.
So I'm gonna take that one off first and set it aside.
♪♪ Now, these two, I can see go on the three wire together.
Those are my travelers.
And I'll put these over here together.
So I know that was my common.
Those are my travelers.
So with this box, I'm gonna take this apart.
And I should be able to see... ...if I have multiple feed wires coming out of here, going to each of these switches since they're single poles.
All right.
So we can see that wire nut.
We can see this wire coming off.
That was our common.
It also comes off and goes to the black wire, the feed-in on this switch, and it has another pigtail that comes off and goes to this switch.
So that is our feed wire.
So we know that that common is our feed.
The switch at the bottom of the stairs will be the light.
And now we can install the new smart switch.
So first, we're gonna start with the ground wire.
This will either be a green conductor or a bare copper wire.
Next, I'm gonna do the two travelers.
Now, for this, you want to pay attention to which color wire you put where.
I'll do the red to the red traveler, the black to the blue.
♪♪ And finally the black wire is gonna connect to our common, which is our feed.
Make sure everything's secure, and then try and fold everything neatly into the junction box.
What you don't want to do is stuff the wires in too tightly or risk anything coming loose or getting pinched.
So make sure everything has plenty of room to move.
♪♪ ♪♪ ♪♪ All right.
So now it's time to address the second three-way switch at the bottom of the stairs here.
Now, while there are a variety of ways to configure this switch that we have upstairs, I'm gonna show you two different options.
The first one is gonna be installing this.
And this is essentially a remote control.
What's gonna happen is, you have this switch in place with the three wires and the three screws.
You're gonna take all three off and put them together under one wire nut.
Push it in the into the back of the box, and then you're gonna take this remote and screw it into the switch box.
And it actually comes with a bracket here to do just that.
So you'll screw this in, apply the plate, and you'll be ready to turn power on upstairs.
Now, what happens is, this is now simply a remote control that talks to that switch.
So in order to link them, you press and hold the button for six seconds here.
You do the same thing on the switch upstairs.
The two are linked.
And now you can actually dim it and control everything from both locations.
In this situation, though, we want to keep the mechanical switch like we have.
It's just simpler to use when guests come in and out.
So what's gonna happen again is, we have the common and the two travelers.
But, remember, we paid attention to what traveler we tied to what color upstairs.
We took the red wire on the switch and put it to the red traveler wire.
Keep that in mind, because we're now gonna take that red wire and combine it with the common wire.
So the red traveler and the black wire on the common are gonna go together under the common screw.
The other traveler wire -- in this case, the other black wire -- is gonna go to either one of the brass screws.
Doesn't matter which one.
And then finally one brass screw simply won't have a wire on it.
All right.
The first thing to do, again, is take the switch plate off.
Now I'll just double check that the power is off.
It should be off, because we turned that breaker off that controlled the three-way switches.
But you never know if something else is on a different circuit.
So it looks like everything is off.
[ Drill whirring ] Next, I'll take the three-way switch out.
Okay.
So you can see we have a black wire on the common.
In this case, we know that's our light fixture.
And then we have a black.
And the red on the travelers.
Now I'll take the jumper that comes with the smart switch, tie it together with the other two wires, and go ahead and put that on the common screw.
And then go ahead and twist a wire nut on clockwise as well.
So now I will take that little jumper and I will put that on the common.
So there you can see we took the wire that was on the common, and the red traveler that goes to the red wire on the smart switch, put them together with a pigtail, put them on the common, and left the other traveler, the black wire in this case, alone.
Now we're ready to install the switch.
All right.
Now that the power's back on, let's go ahead and test it.
So it turns on here.
All right.
So the light works from the bottom.
Let's go ahead and try to turn it off from up here.
And there we go.
It works from both sides.
Great.
The system is up and running.
So now we have our smart switch installed, and it's ready to tie to your home lighting system.
♪♪ Brennan: Hey, Richard.
Thanks for coming by.
Richard: This is quite the old gem.
Brennan: Yeah.
Kind of a diamond in the rough.
Richard: How old the house is it?
Brennan: Over 250 years old.
Richard: They didn't have an automatic water heater back then.
Brennan: I'm sure they didn't.
So, here is my somewhat neglected water heater.
Richard: What do you mean, neglected water heater?
What do you got?
It's...What is it?
-Eight years old.
-Brennan: That's right.
Richard: What haven't you done?
Brennan: Well, there's a note here from the prior owner telling me I should have changed an anode rod a couple years back.
Richard: Did you know that you had an anode rod?
Brennan: Don't know what it is.
Don't know what it does.
Don't know how to change it.
Richard: It's something that should be changed regularly.
It looks like we may be too late.
You can see there's all sorts of corrosion here, and you got an eight-year-old water heater.
What I'm gonna do is run to the truck and come back, and I'm gonna teach you how to change your anode.
Brennan: All right.
Sounds good.
♪♪ Richard: All right.
So, in every single water heater, there is a rod like that.
That's an anode rod.
It's made out of aluminum.
It's made out of magnesium or sometimes zinc.
What it does is it sits down inside the tank.
So just imagine it sits in right there.
And it is this sacrificial rod.
It's is actually designed to have any corrosion, electrolysis that happens naturally in water from attacking the tank, because the tank itself is glass-lined steel, okay?
So now, if that glass lining was to have any imperfections, that electrolysis would want to eat this -- but it would eat this first if it's operational, because it's a sacrificial anode, okay?
That's what it looks like brand new.
This is one that just came out.
It just came out of a water heater that is about this age.
-It's about 10 years old.
-Brennan: That's crazy.
Richard: And that's all that was left.
Once that sacrificial anode was gone, we actually saw on that water heater a very similar condition, where it started to show rust here, -and then ultimately it leaked.
-Brennan: Okay.
Richard: And if you change the anode and you did it every two to five years, you could make the water heater last almost indefinitely.
-It could be 20 years versus 10.
-Brennan: Okay.
Richard: So this is a $40 part, okay?
The problem often is how to get it into it, okay?
Brennan: All right.
Richard: They made this just for you, Brennan.
Look.
This is a replacement anode.
Do you see how it can bend?
So now there's a tapping right here, and you can bend that and get it down into it.
Brennan: Okay.
Richard: So to get that anode out, we got to drain the water down, but not all of it.
So I'm gonna turn the water off right here.
And we want to just drain it down to about here so that we have the weight of the water in the tank holding back when we try to back the anode out, okay?
Put that hose on there, if you would, for me.
Then, when you get that on, just open up the drain valve.
I'm gonna go open the hot-water faucets upstairs -just to vent it back to you.
-Brennan: Sounds good.
Richard: All right.
By letting that hot-water faucet open, we will let the air come down and drain out all the water in the piping.
Let me know when you got half a bucket or so.
[ Air hissing ] So, what'd that water look like coming into the bucket?
Brennan: Real funky at first.
Richard: People don't realize that the bottom of that tank is a natural place to collect sediment.
So one good tip is to actually take a little bit of water out every six months, because any sediment that's down there is going to affect the fire-to-water transfer.
So you can extend the life just by doing that.
So that's on your list, right?
-Brennan: Yep.
-Richard: Okay.
Now I also want to turn off the gas or electricity, depending on the type of water heater.
All right.
So welcome to Anode Replacement 101.
-Brennan: Can't wait.
-Richard: Okay.
Anodes have a standard-size head, and it's 1 1/16, okay?
So you can get a socket that can fit.
The standard is always a 12-point socket.
And that goes on top of it.
And the simplest approach is just to get a breaker bar with a ratchet and get on top of it and back it out.
If it's been in only for a little bit of time, it should back out readily, okay?
Now, most people ignore it for what, five years?
You, eight years, whatever.
How many years.
So what happens is it wants to fuse in, and now you have to step up your leverage.
So now you'd go to a heavy-gauge ratchet, again with a 1 1/16, and a pipe or an extender.
Now you're gonna extend your leverage against that nut.
But the more force we put on it, the more we got to worry about the whole water heater dancing.
So one little tip is to use a strap that lets a second person hold back against it, okay?
Because if you don't, these pipes could bend, the gas connection, and even the vent.
Brennan: Don't want that.
Richard: And the water in the tank is our friend here to hold this tank in place.
And if that doesn't work... the last line of defense is actually an impact gun, like this.
You also want to search out a six-point socket.
The standard universal socket has 12 points, and that could actually round over the nut.
So you can see that the nut itself has got six sides.
And this will match it perfectly for the most amount of grip.
The impact gun is the perfect tool for this because it gets high, high torque with low, low speed.
And it's much like the air gun that takes the lugs off in an auto-body shop.
So are you ready?
'Cause you're doing this.
-Brennan: Oh, geez.
-Richard: So, you feeling lucky?
Brennan: Not particularly, but we'll give it a go.
Richard: All right.
Peel that piece out right there.
Expose the head of the anode.
Perfect.
I'll hold back a little bit.
You down on it?
-Brennan: Yep.
-Richard: Okay.
Nope.
No.
Okay.
No.
All right.
Now, that's pretty well in there.
So now I could -- Let's pull that off.
I could hand you these two, okay?
But time is money.
[ Laughing ] Let's try this guy.
And get that six-point right down on top of it.
It's going the right way, right?
Yep.
Make it go down.
-Is it down all the way?
-Brennan: Yep.
Richard: It's got a little torque, so just give it a little pop.
[ Drill whirring, metal clanging ] Go.
Go.
Go.
Go ahead.
-Did it come?
-Brennan: Yep.
Keep going?
-Richard: It might be unloose.
-Brennan: Yeah.
I think it's finger-tight.
Oh, no.
Richard: Oh, my goodness.
There's no anode rod left.
This awful one's even better than this one.
All right.
So here's our new anode rod.
I want to apply a little Teflon tape to the threads.
All right.
So now we're gonna bend this first one so we can get it down in there.
Okay.
Now just -- We want to bend that straight now.
Put it back to more straight so it'll hang straight down.
-Brennan: Yep.
That's better.
-Richard: There we go.
-All right.
Good.
-Brennan: All right.
Richard: Catch that thread without crossing it, please.
Let me try it.
[ Ratchet clicking ] Okay.
So now we've got a brand-new anode in there.
I see all this corrosion.
There's a really good chance that this water heater would then leak what, -two weeks later?
-Brennan: Yeah.
Richard: You'd be talking to the whole neighborhood about me.
-Brennan: Of course.
-Richard: Okay.
So I think what we should do is I'm gonna get you a new water heater and install it -- only if you promise that you will change that anode every two to three years.
-Brennan: I promise.
-Richard: I don't believe you.
Okay.
I'll be right back.
♪♪ ♪♪ ♪♪ [ Drill whirring ] ♪♪ There are so many things in this life we know we should do -- you know, rotate your tires and clean the dryer vent -- and changing the anode rod is just one more of them that nobody does.
-But you're gonna, right?
-Brennan: Absolutely.
Richard: All right.
Now, there is a story.
This replacement anode rod is 40 bucks.
That new water heater is about 1,000.
If this little rod can make that water heater last twice as long, 20 to 25 years, I hope you do it.
Brennan: Absolutely.
Richard: There's even instructions!
I want you to do this, and I'm gonna actually call you, too.
-Brennan: Yeah.
Hold me to it.
-Richard: Okay.
What you're not gonna get, though, because I know you're gonna do it, is this.
-Brennan: Fair enough.
-Richard: Okay.
Brennan: All right.
Thank you so much for the knowledge and the labor and the experience.
Richard: You were a great help.
-Brennan: Have a good one.
-Richard: I'm gonna call you.
♪♪ Kevin: Next time on "Ask This Old House," Jenn travels to Idaho to meet a homeowner whose backyard has become a community gathering spot and is in need of some TLC.
Jenn: You ready to shovel with us?
Woman: Yeah.
Keep it moving.
I love it!
Jenn: We like the rough side out on these boards.
Woman: I like the texture too.
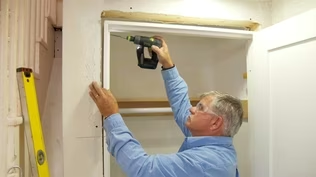
Kevin: And are your window wells in rough shape?
Mark will show you how to replace them.
Mark: It's not as easy as it looks.
Kevin: All that on "Ask This Old House."


- Home and How To

Hit the road in a classic car for a tour through Great Britain with two antiques experts.


Support for PBS provided by:
Funding for Ask This Old House is provided by The Home Depot, Renewal By Andersen, and ChipDrop.